|Zombie*-Ext-|

|Zombie*-Ext-|

Selasa, 14 Februari 2012

Belajar bikin animasi

image 1

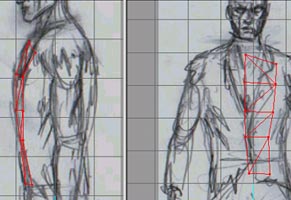
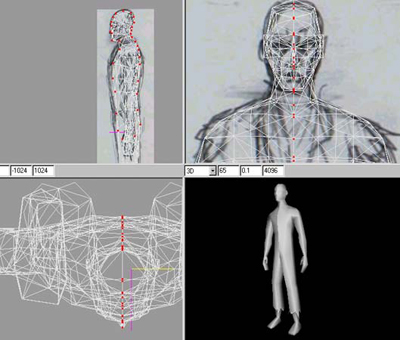
SCAN DI DRAWINGI ANDA biasanya menggambar depan yang sangat kasar dan samping menjaga mereka sejalan satu sama lain, maka saya memindai mereka masuk, mengubah ukuran sekitar 500 pixel tinggi, gelap gambar sehingga simpul dan garis putih muncul ketika bekerja dari atas di Milkshape. Saya memotong mereka dan menyimpannya sebagai Front.jpg dan Side.jpg kemudian di Milkshape, klik kanan pada tampilan depan untuk membuka menu, dan "Pilih gambar latar belakang" menggunakan Front.jpg dan melakukan hal yang sama untuk sisi tampilan (menggunakan Side.jpg), Anda dapat melihat apa yang saya maksud pics berikut

image 2

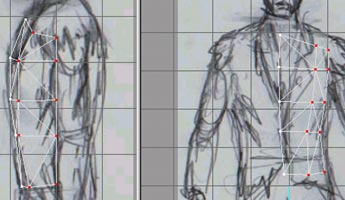
MULAI MENAMBAHKAN VERTSI biasanya mulai dengan membuat beban verts dalam strip sampai bagian depan dada, aku memindahkan mereka semua satu per satu ke posisi, dalam pandangan depan dan samping, maka saya membuat wajah untuk bergabung dengan titik, Check out saya Milkshape lain dasar-dasar tutorial jika Anda tidak tahu bagaimana melakukan ini. Seperti yang Anda lihat wajah-wajah yang cukup datar di bagian depan batang tubuh ...

image 3


image 4

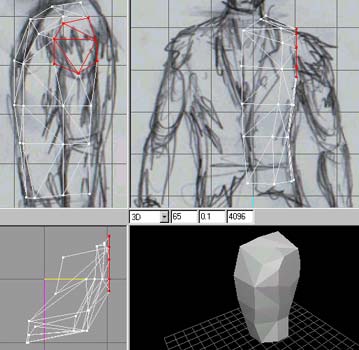
BERPIKIR TENTANG STUFFBuilding wajah lebih dengan menambahkan verts beberapa pada satu waktu dan membuat wajah, saya juga berpikir tentang di mana bahu akan diekstrusi dari, jadi saya membangun wajah (seperti yang ditunjukkan dipilih) sehingga saya nantinya bisa mengekstrusi dll bahu / lengan dari itu. Kadang-kadang Anda perlu untuk merencanakan ke depan :)


image 5
 
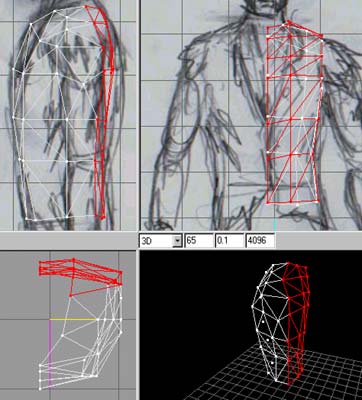
ATAS BACKI terus menambahkan verts di sisi tampilan dan wajah bangunan, saya kemudian memindahkan semua verts ke posisi untuk mengikuti bentuk belakang dan juga turun garis tengah, sehingga ketika model dicerminkan tepi depan dan belakang tepi dapat dilas.
image 6
 
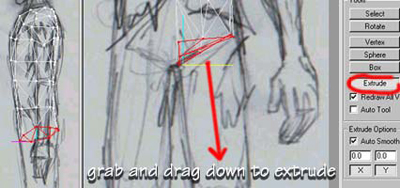
Mengekstrusi ATAS Legi menambahkan verts dan membuat bagian atas wajah kaki bangunan (Anda membutuhkan menghadapi sana untuk mengusir dari), memastikan mereka menghadap ke bawah dengan melihat dari bawah dalam tampilan 3D, maka saya memilih semua wajah, KLIK mengusir dan pada tampilan depan drag em ke bawah menciptakan paha
image 7
 
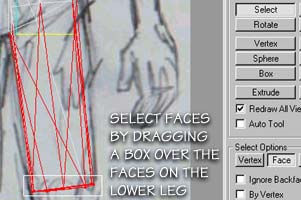
PEMILIHAN FACESNow AKHIR memungkinkan hanya mengatakan saya kehilangan seleksi saya dan ingin memilih akhirnya menghadapi untuk mengusir segmen berikutnya kaki? Ok, kita drag kotak dan memilih semua wajah kita ingin ditambah semua yang lain kita benar-benar tidak perlu, tetapi harus memastikan kami mendapatkan semua wajah di ujung paha. Periksa langkah berikutnya .....
image 8
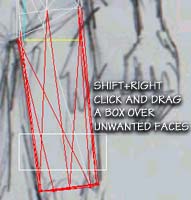
PEMILIHAN WAJAH AKHIR 2Now drag kotak seperti yang ditunjukkan saat HOLDING SHIFT dan tombol mouse sebelah kanan, ini akan menghapus wajah yang tidak diinginkan dari pilihan Anda hanya menyisakan akhirnya menghadapi dipilih siap untuk mengekstrusi segmen berikutnya kaki. SHIFT dan KIRI KLIK menambah apa pun yang dipilih dan SHIFT dan KANAN KLIK menghilangkan dari pilihan


image 9

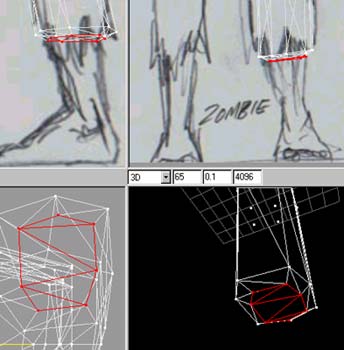
MORE EXTRUDINGI extruded down a few more times scaling it in front and side views to match my reference images and as you can see here I need a step where his torn trousers will end so I extrude a small amount then scale it in from front and side to match the size of the leg..
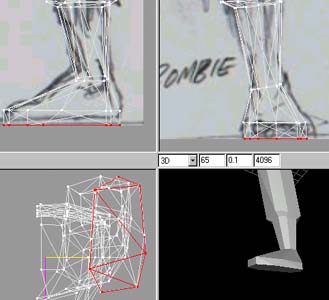
image 10

EVEN MORE EXTRUDING....I Extruded again and scaled it to the size of the ankle in the front and side views and moved it into position slightly, I did the same for the foot. When scaling you get three options, Center of Mass, Origin and User Point. Select "User Point" that way whatever is selected scales relative to where your cursor is, try it to see what I mean :) Very very useful
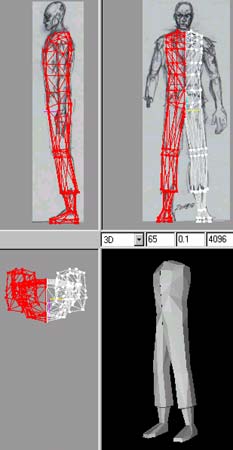
image 11

TESTINGI went to Edit-Duplicate selection then Vertex Mirror Left->Right to get a mirrored copy, I moved it across so the center lines were overlapping. Now its time have a real good look over it in the 3D view and turn any edges or tweak verts that aint quite right. Actually I do this many times as I'm modelling just to keep an eye on things! I then Deleted the duplicate and carried on working on just one side.
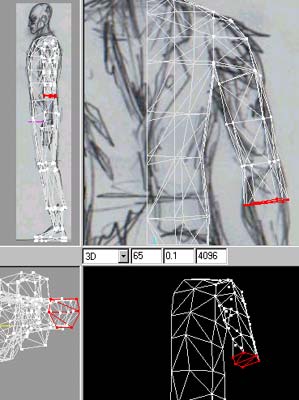
image 12

THE ARMSelect the faces that we purposely created in the shape of the shoulder and extrude out horizontally once to create the shoulder, move the verts to follow the shape of the sjoulder in the reference image, Now deselect and eslect the faces that are facing downwards, extrude the arm downwards scaling as you go along following the reference images again. Some faces dont quite look right sometimes so you need to select two faces and use CTRL E or turn edge, please read my milkshape basics for more on this but after a while you'll know which faces need turning (after about your tenth model :))
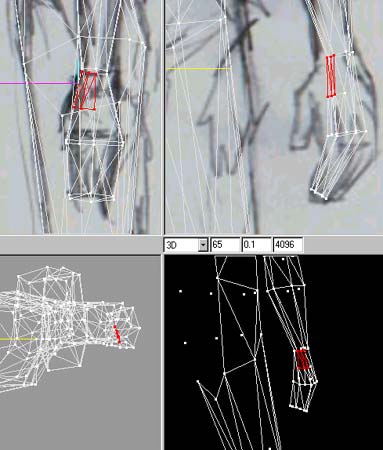
image 13

THE HANDI extruded the arm down and carried on to form the basic shape of the hand, I needed some extra faces to extrude the thumb from so I used "Subdivide 4" this divides the selected faces, and it was a BAD IDEA!!!!!! It left me with vertexs in between others etc, I had to search em out and snap and weld them to other existing verts, took me a while, so my TIP is plan ahead like I mentioned earlier, I should have extruded just one more time and I would have had the faces I needed to extrude the thumb But this is how I learn, the hard way :).
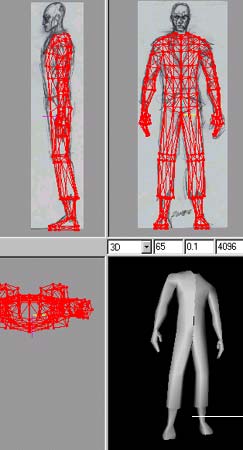
image 14

TESTING AGAINI duplicated and mirrored again to see how things where looking, put it in Smooth shade mode, looked over it tweaked things, put it in Wireframe mode and looked over it tweaked things, put it in Flat mode and looked over it tweaked things from all angles. when I say tweaked I mean moved vertexs into better positions, turning edges that dont look right and generally making sure it looks OK from all angles. Then its time for the head!! Delete the duplicate and make a start on the head......
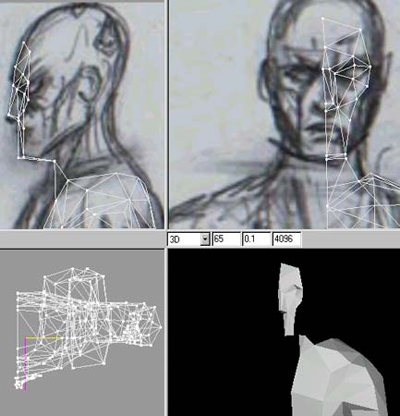
image 15

THE FACENow for the fun part!!! I add some verts basically forming the flat-ish front of the face, I move them into position using the side view as well to follow the lines of the face, then I build the faces. Basically just like building the torso, add a strip of verts, move em into position and build the faces. As you can see I place verts where changes in the faces that make up THE FACE will occur...Get what I mean? :)
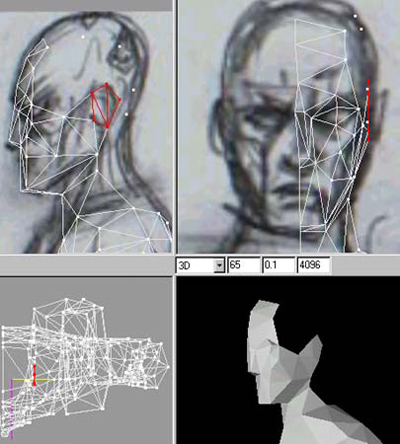
image 16

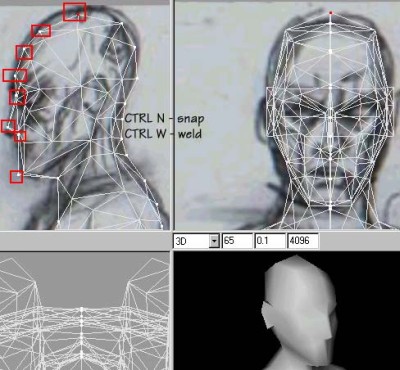
THE HEAD AND EARNow I started adding some verts to the side of the head and moving them into position using the front view, As you can see I built faces for where I intend to extrude the ear from later (Selected in RED) Other than that its a case of adding verts, building faces and constantly checking in the 3D view (FLAT shade mode) if any edges need turning.
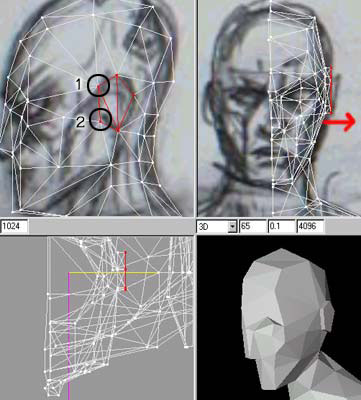
image 17

THE EARI added more verts and built faces for the back of the head. I then Selected the faces for the ear and extruded it out once, I dragged a box around the two verts marked "1"selecting them then I Snap 'N' Welded em using CTLR N and CTLR W, I did the same for the two verts marked "2" This brings the front edges of the ear in flush with the head instead of sticking out like a block (see the picture after the next one)
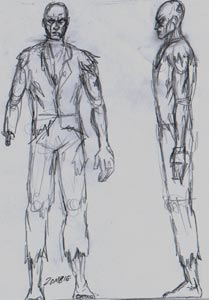
image 18
Click to enlarge

SELECTING THE CENTER VERTSI am satisfied with it now So I duplicate and mirror and move the duplicate so that its center line is touching the the originals center line. I select ALL and Regroup them into one mesh in the groups tab. Then from the TOP view I dragged a thin box over all the center verts selecting them, then I used CTRL I to invert the selection and CTRL H to hide the selection, this leaves me with just the center verts visible. Even though it only looks like theres one vertex at each point there is two, one from each half of the model, so in the next step we will weld them together to get rid of the seem.
The Zombie - Modelling
Click to enlarge

SNAP AND WELD THE SEEMI start by selecting the verts on the chin for example (So I remember where I started from) I use the side view and drag a small selection box around the vertex (well two verts really) in the chin, I use CTLR N and CTLR W to snap and weld, then I select the vert under the nose and Snap and weld and so on and son on, all the way around the center line and if you set the 3D view to Smooth shading you can see the seem being closed as you go along. Thats it really, easy wasn't it? The next tutorial will be about grouping and UV mapping using Lithunwrap!! Hope you found this useful.


Read more: http://www.webdesign.org/3d-graphics/tutorials/the-zombie-modelling.6299.html#ixzz1mLFxWFdm

BELAJAR EDIT FOTO

photo shop yaitu aplikasi untuk edit Photo dan Kumpulan Software untuk Edit photo gratis untuk anda. Bagi sobat yang mencari aplikasi untuk edit foto maka tidak ada salahnya menggunakan aplikasi gratisan namun gak kalah dengan kualitas aplikasi yang berbayar. Berikut ini adalah software atau aplikasi gratis untuk edit photo.

aplikasi software edit photo


1. Photoscape

Pastinya gratis, Aplikasi ini cukup ringan dan sudah digunakan oleh banyak sekali user. Photoscape berjalan di sistem oprasi windows. Penggunaanya user friendly alias mudah. Anda tidak harus mashi karena hampir semua toolnya siap klik dan langsung jadi.

"The program loads fast and possesses an interface completely different from those familiar with Adobe's industry-leading tools. Users are greeted by circular navigator complemented by a tabbed nav on the top of the main screen. Most but not all main features are accessible from either nav. It might take some people time to get used to the unusual layout, but it's only unusual for an image editor; otherwise it's intuitive, fast, and lacks only the most advanced of image editing features". PhotoScape Free

2. IrvanView

Sftware edit foto yang satu ini juga gratis, kelebihanya tidak jauh beda dengan photoscape. Bisa digunakan dengan multiple media format. Silahkan di coba aja langsung.

"The program lets you open and edit images, as well as multiple media formats. You can cut and crop images, apply batch conversions, add, sharpen, or blur effects, create panoramas, and change color modes easily. The program continues to add support for an array of file formats and has plug-in support for most image, video, and sound formats, including MP3, AVI, audio CD, and WMA. The interface is far from fancy but should be easy enough for most users to figure out. An IrfanView Thumbnails shortcut on the desktop offers an Explorer-like file tree that quickly displays all images in a particular folder. The latest version includes a basic drawing palette made accessible by hitting F12. It contains simple Erase, Draw, Fill, Rotate, Draw an Arrow, and Color Picker commands, perfect for grabbing screenshots and highlighting image specifics"

Selasa, 07 Februari 2012

CARA MENGHILANGKAN STRESS


Bermain sepuas hati...... WE ARE GAMER'S

BELAJAR MANDIRI

Kamis, 23 Juli 2009

Nyetel langsam motor honda bebek

Buat yang kepengin nyetel langsam motor Honda bebeknya dirumah, nih saya kasih tipsnya...
Putar Pilot Screw (stelan langsam) searah jarum jam untuk memperbesar RPM mesin hingga kira 2 3000 RPM.
Putar Air Screw (Stelan Angin) kekanan (searah jarum jam) hingga mentok, pada kondisi ini mesin seakan-akan mau mati (RPM menjadi rendah)
Putar kembali Air Screw kekiri (berlawanan dg jarum jam) kurang-lebih 1 ,5 - 2 putaran
cari diantara posisi itu RPM (putaran mesin) tertinggi
Setelah didapat putaran tertinggi, kemudian kecilkan RPM dengan memutar pilot Screw kekiri hingga di dapat RPM 1300- 1400 atau bila tidak menggunakan RPM meter bisa di cari pada RPM terendah dimana putaran mesin tidak terjadi pincang2.
selesai
Kesulitan-kesulitan :
Apabila pada saat memutar air screw kemudian tiba2 mesin mati, maka putar sedikit pilot screw kenanan/perbesar RPMnya lalu nyalakan lg motornya dan lanjutkan langkah ke-3
Apabila RPM motor susah stabil/tidak bisa stabil/pincang2 coba dianalisa pada :
RPM kurang tinggi (batas minimal 1300RPM) bila dibawah itu tidak baik untuk keawetan mesin (artikel mengenai efek bila RPM mesin terlalu rendah menyusul)
Oil seal yang berada didalam air screw, mungkin rusak atau tidak ada sealnya apabila oil seal nya rusak/hilang, ganti dengan menggunakan oil seal yang sesuai dengan ukuran, atau bisa diakali dengan menggunakan karet seal yang berasal dari dalam karet korek api gas, caranya pecahkan korek apinya dan cari karet seal yang seukuran dengan oil seal air screw tadi dan gantikan. oil seal ini berpengaruh sekali karena berfungsi mencegah kebocoran udara dari dalam saluran air screw menuju keluar.
Apabila masih ada kesulitan lain, silahkan sampaikan kendalanya disini... ?